Helpful information
Timing: Mid-autumn to mid-winter (when the plant is dormant, i.e. not growing)
Where to do it: Outdoors / indoors
Garden space: Large garden, small garden
Timing: Mid-autumn to mid-winter (when the plant is dormant, i.e. not growing)
Where to do it: Outdoors / indoors
Garden space: Large garden, small garden
Propagating plants is an exciting gardening skill. It allows you to grow new plants for free. It shows that life can continue and renew from difficult circumstances, which can be comforting to know.
There are many ways to propagate plants, including by saving seeds and sowing them, through offsets and by taking cuttings.
Depending on the time of year, different types of cuttings are taken:
A good time to take hardwood cuttings is just after the leaves have fallen from the plant. At the latest, you want to do it before any buds appear in early spring. Avoid taking cuttings on extremely cold or frosty days, as this will reduce the chance of success.
Why choose hardwood cuttings
Some woody plants tend to be propagated most successfully through hardwood cuttings. These plants are able to form new roots from dormant, mature shoots.
Because it can be done into the winter, taking hardwood cuttings also gives a reason to get outside in the colder, quieter garden months.
Lots of plants can be propagated from hardwood cuttings. These include:
1. Deciduous trees
Plane, poplar, hawthorn and willow trees all grow well from hardwood cuttings.
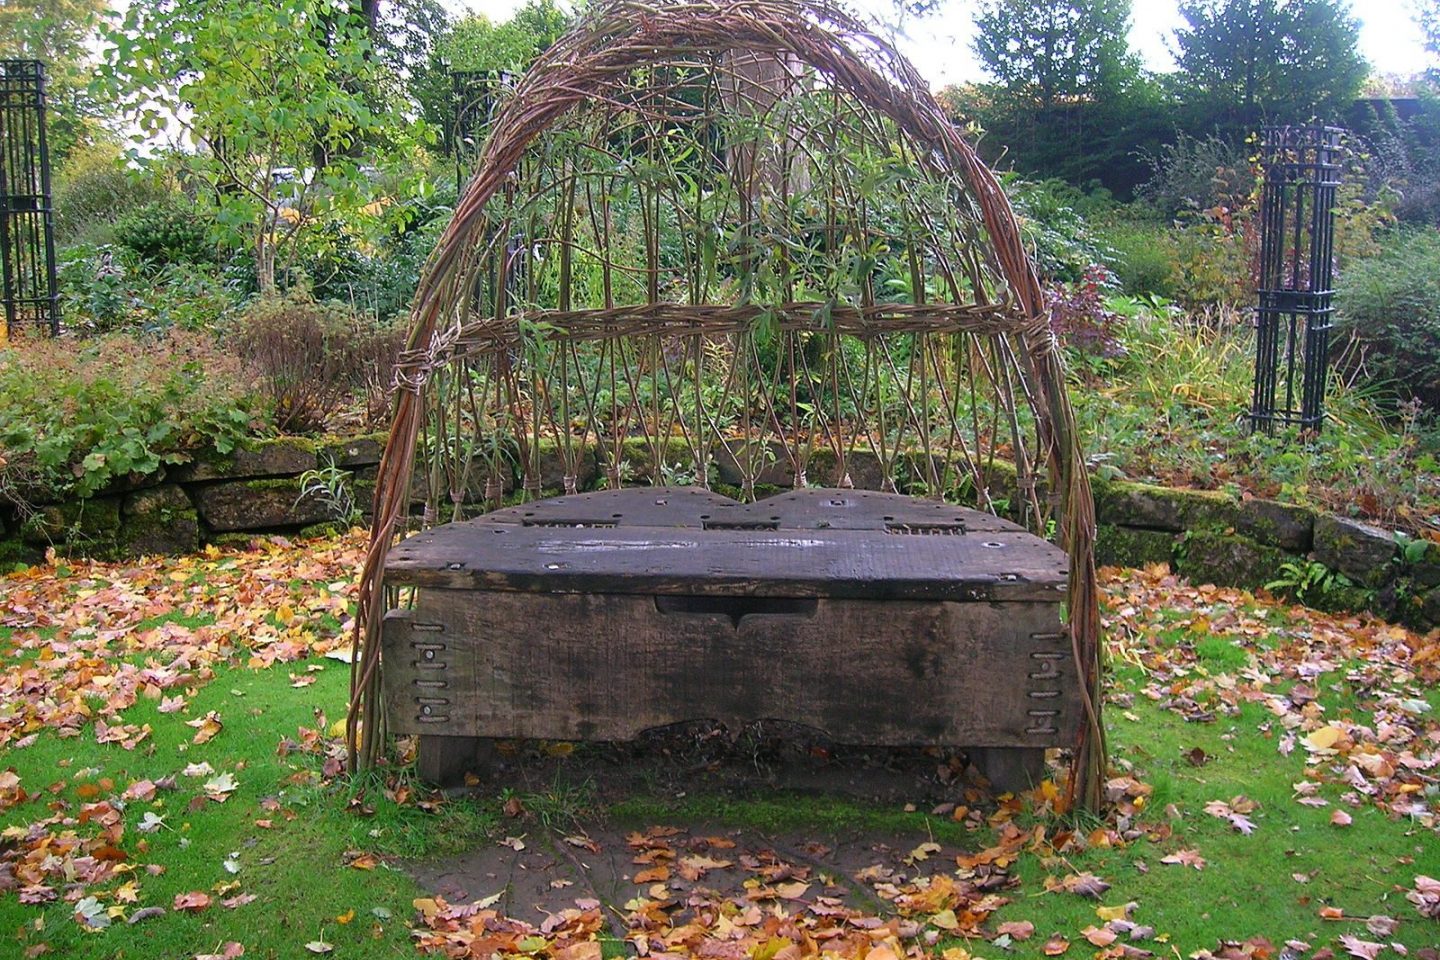
Willow is particularly successful. In many therapeutic gardens, willow is taken as a hardwood cutting to create tunnels, arbours, arches and sculptures. Once established it will produce lots of new wood that can then be used in many craft activities.
2. Climbers
Lots of climbers take well from hardwood cuttings. Honeysuckle, jasmine and Virginia creeper are examples.
3. Shrubs
Deciduous shrubs are great to propagate from. Rose, buddleia, forsythia, dogwoods (cornus), fuchsia and hydrangea are quite reliable.
4. Soft fruit
For us at Thrive, soft fruit is one of our favourites to propagate as hardwood cuttings. Gooseberry, red, white and blackcurrant alongside raspberries and their cousins. Nothing beats harvesting a glut of berries to be turned into jams and crumbles.
Essential tools
Optional tools
Follow these steps to take hardwood cuttings with ease.
Step 1: Find a plant to take cuttings from
Go to the plant you want to take hardwood cuttings from. Check that it has enough healthy, suitable stems. You will be taking cuttings from this year's growth that are at least 15cm long and roughly as wide as a pencil.
Step 2: Gather your equipment
When you are happy you have found a plant and the time is right, gather all your equipment ready to take and plant cuttings.
The cutting itself will be made outdoors from the plant. You could then do the rest of this activity from a seated position, if you are putting the cuttings in a container. You could choose to do this at a table inside or outside.
Step 3: Take your cuttings
As mentioned above, each cutting should end up being around 15cm long and as wide as a pencil.
To start, cut and remove the complete healthy stem from the plant. On a plant like dogwood, this could be as long as 1 metre. This will allow you to create 4 or 5 good sized cuttings from one stem.
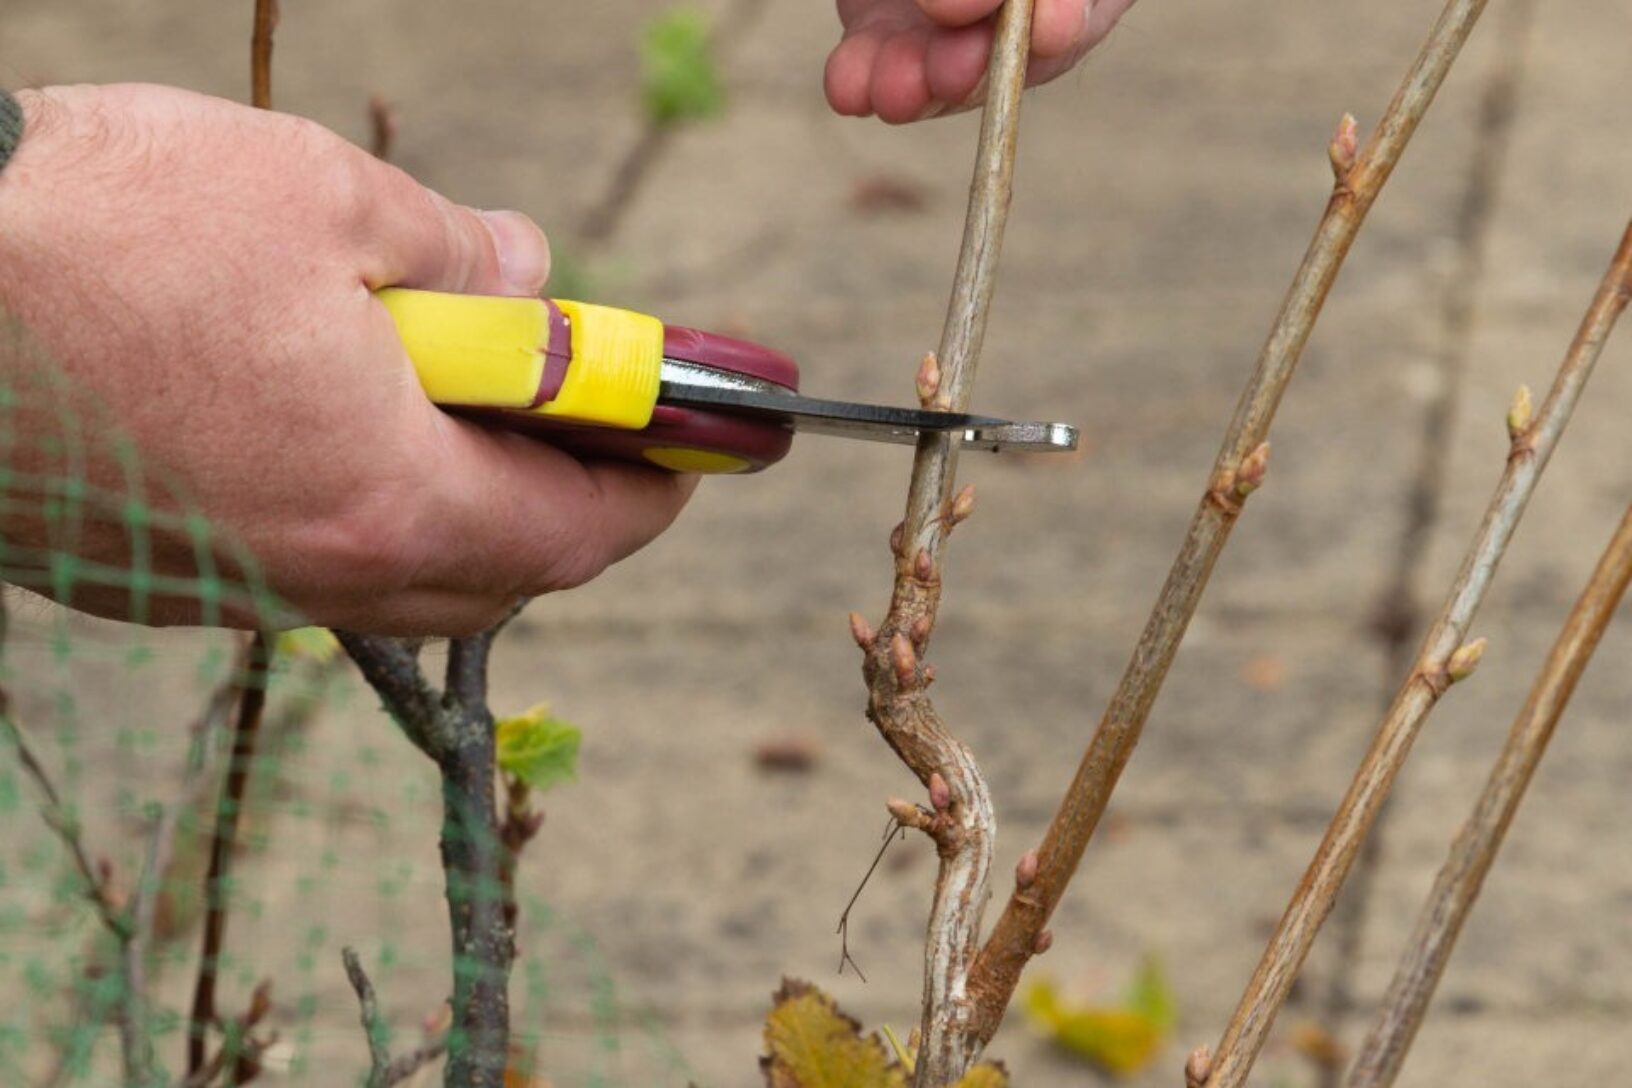
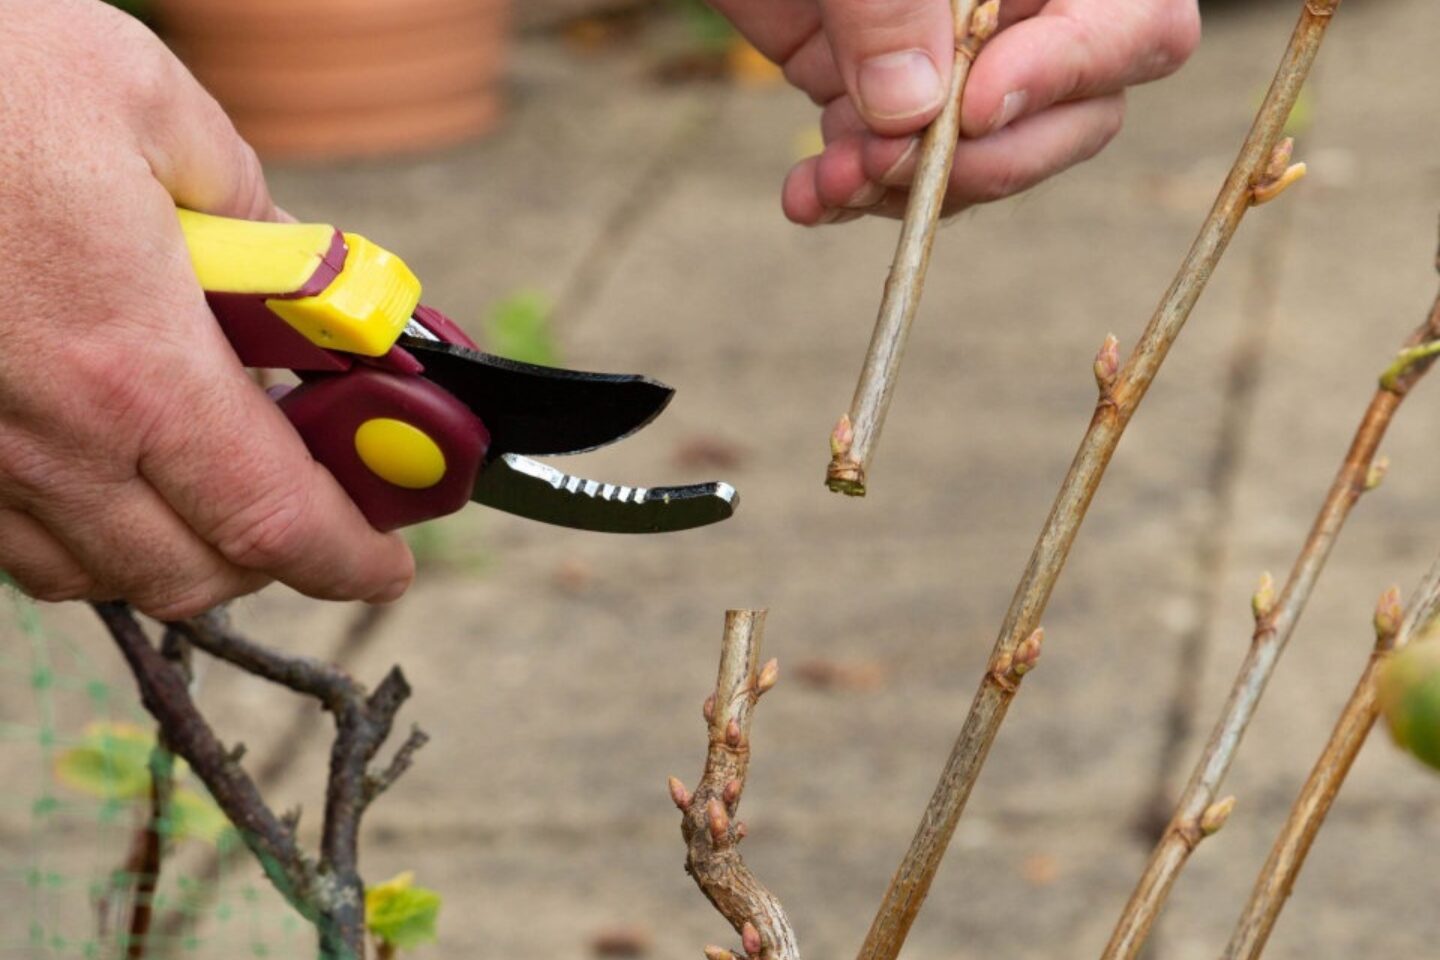
To make a single cutting, find a bud towards the top of the stem. Using your secateurs, cut the stem at an angle just above this bud. Cutting at an angle allows water to run off the stem. If there are leaves or a soft tip above the bud, remove them.
Next, make the bottom cut. Look for a bud around 15cm below the top cut you just made. Using your secateurs, cut below this bud. Cut in a straight line this time, not at an angle.
Cutting above a bud at the top and below a bud at the bottom is important. New leaves and stems grow from the top bud and new roots grow from the bottom bud.
Continue taking cuttings until you have enough of each plant. If you are hoping to produce new hedging, you will want a lot of cuttings. If you want to grow a single new plant, taking 4-6 cuttings should be enough for success.
Some secateurs are easier to use than others. Anvil types hold onto the cutting once you have made it. This means you don’t have to bend to pick it up from the floor. Ratchet secateurs can require less strain, particularly if you have a weak grip.
Step 4: Dip cuttings in hormone rooting powder (optional)
For all types of cuttings, hormone rooting powder can be used to support regrowth and protect from fungal pests.
It is not essential to use this. If you take cuttings from reliable plants (see above) and cut in the right places, you usually will be successful without it.
Step 5: Fill containers with compost
You can grow hardwood cuttings by simply sticking them in a clear area of soil outside. This is a good idea if you are taking a lot of cuttings. If you are only taking a few, planting them in containers gives more options for protection if the weather is particularly cold.
Fill a good size container with multi-purpose or cuttings compost. A container between 3 and 7 litres will fit between 4 and 8 cuttings. Deeper pots, around 20-30cm deep, are preferable.
Step 5: Place cuttings in container
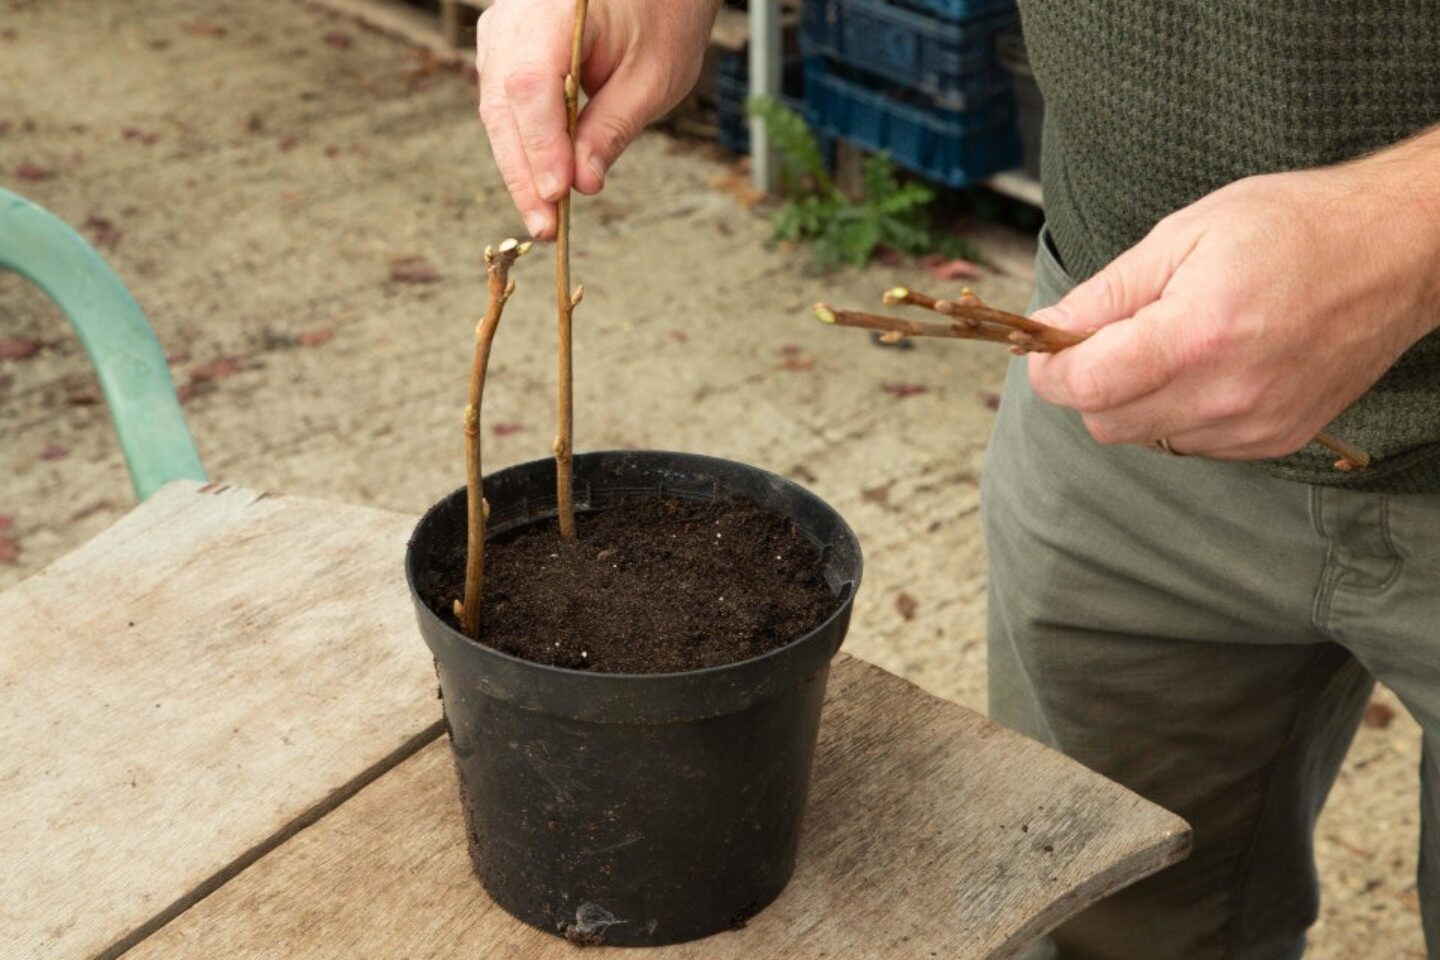
Poke one hole per cutting in the compost. You could use a dibber or just your finger to do this.
Place each cutting in a hole. Make sure each cutting is the right way up, with the angled cut at the top. Firm the compost gently in.
Step 6: Water, label and position container

Water your cuttings well. Put a plant label in, so you know what is growing and when you planted it. A lollipop stick and marker pen works well.
Once done, with most cuttings you can leave the container in a sheltered place outside. If there is a very cold spell, or prolonged frost, you may want to move them into a polytunnel, greenhouse or under a cloche.
Your cuttings should start to produce new growth in spring. It is recommended to keep your cuttings in their container for a full year before planting them out in their final position.
Enjoy watching them as they grow and marvel at your new, free plants!

Taking cuttings is a brilliant way to create new plants. We look at how to take semi-ripe cuttings and which plants it is suitable for.