Helpful information
Timing: All year around
Where to do it: Indoors
Garden space: Balcony, Indoors
Timing: All year around
Where to do it: Indoors
Garden space: Balcony, Indoors
Essential items
Optional items
Start by gathering the tools for the task. Then, follow these steps to create your compost bottle with ease.
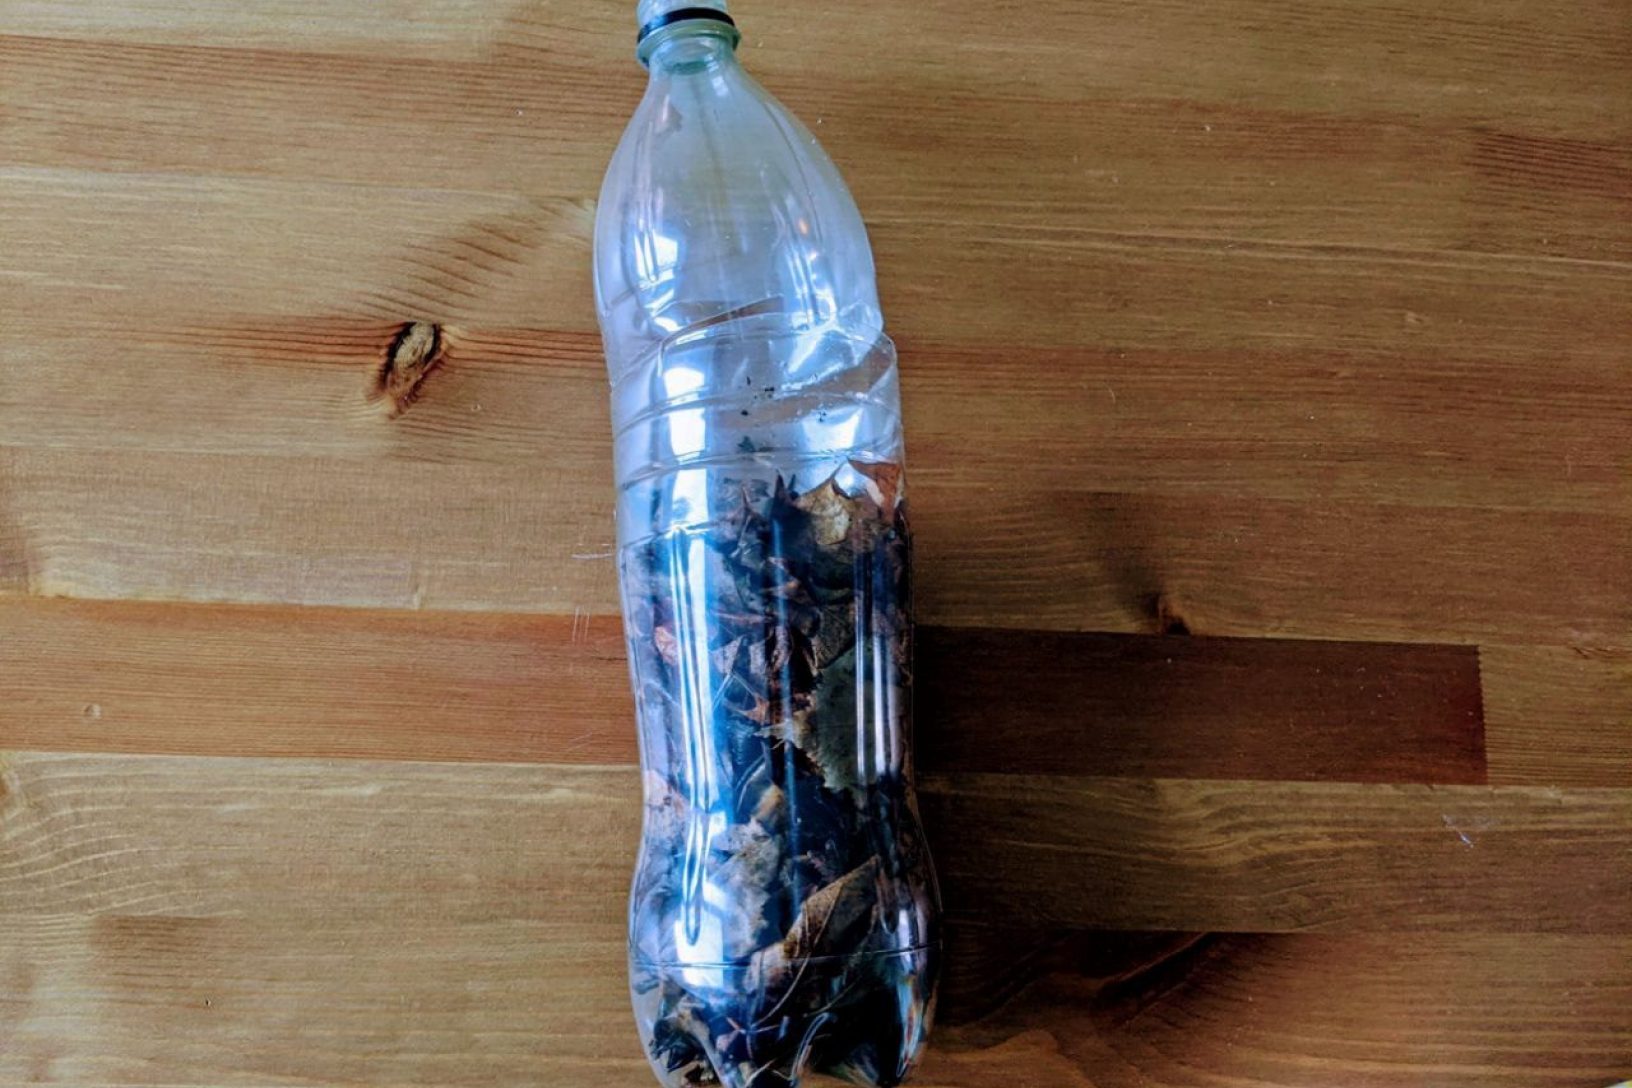
Step 1: Cut around the top of the bottle

You need to be able to get your compost items in and out of the bottle easily. To help cut around the top of the bottle, you may find it helpful to first make a small hole using a drawing pin. You want this to be around 10cm from the top. You may wish to widen this using a pencil. Using this hole as the starting point, carefully cut around the bottle with scissors.
Instead of cutting all the way around the bottle, you could leave a small hinge (see image above). This will make it easier to seal.
Step 2: Add compost layers
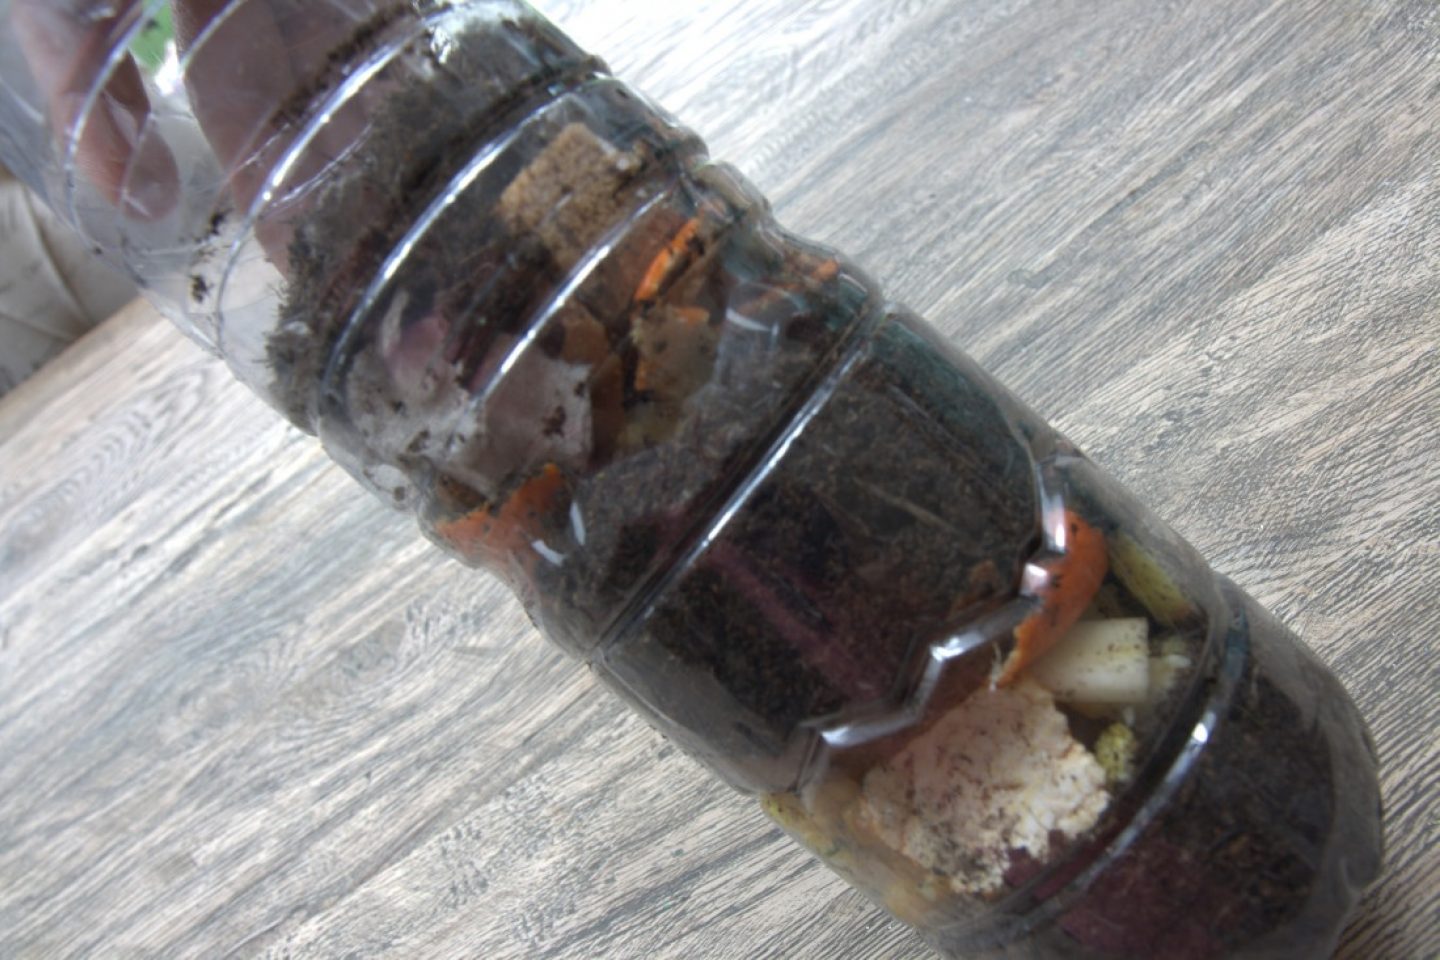
Good compost is a mixture of ‘brown’ and ‘green’ materials. Brown materials are woody, like twigs, and green are soft and green, like grass cuttings. Read our article on making home compost for more information.
Because a compost bottle is small, try to choose waste material you can cut into little pieces.
Ideally, layer your compost bottle as follows:
Repeat these layers until your bottle is almost full to the top. The very top layer should be soil.
If you want your bottle to make compost faster, add compost maker / accelerator to the top layer of soil.
Step 3: Water, seal and wait
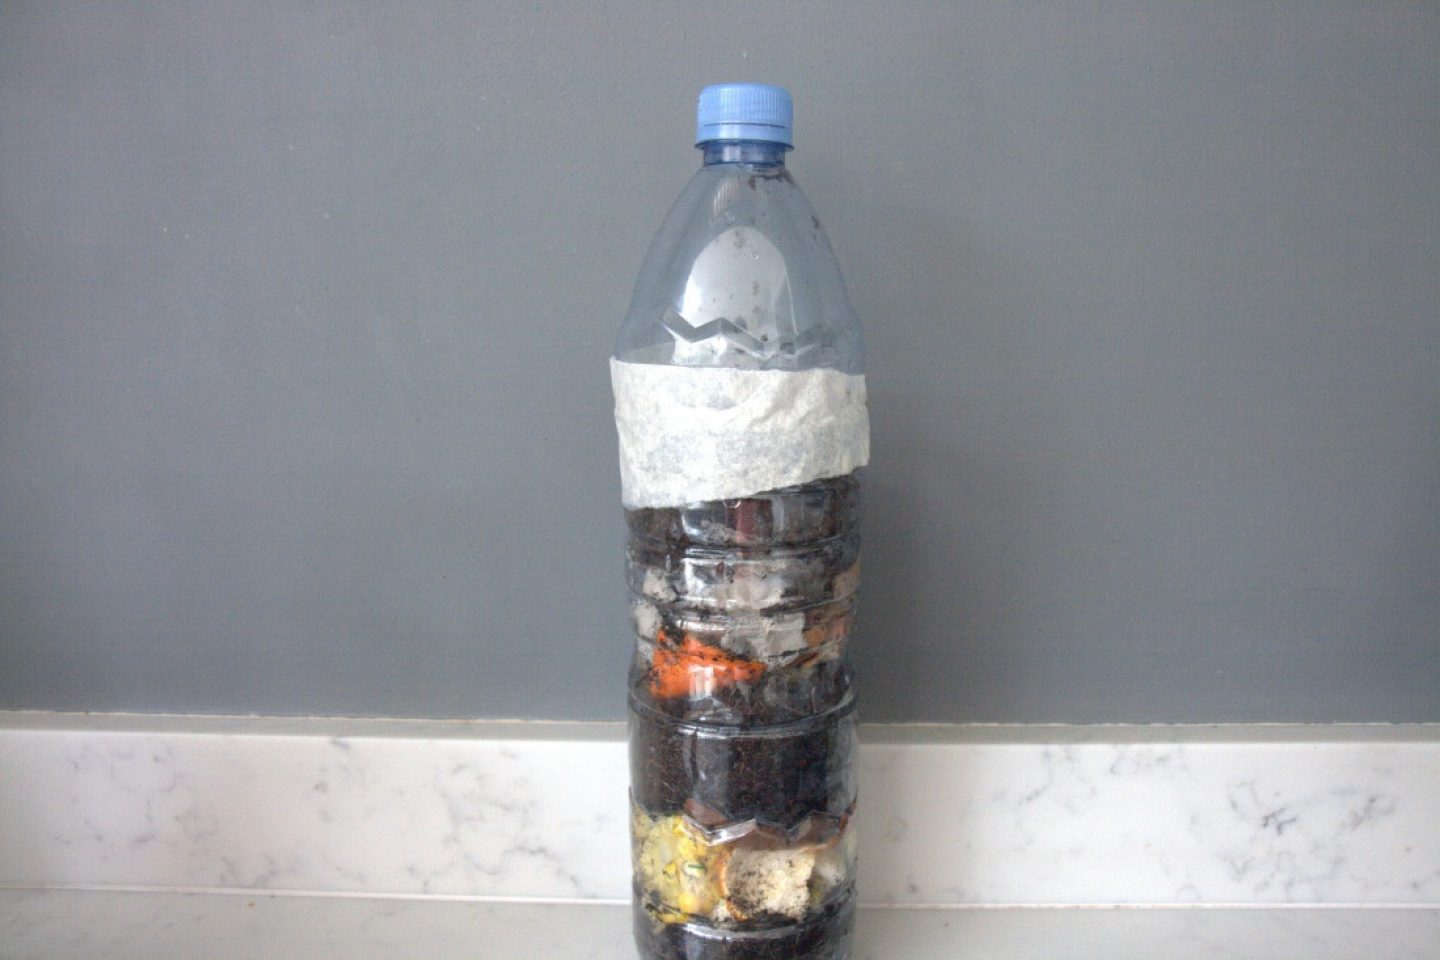
After you have filled your compost bottle, add a little water (around a tablespoon). The mixture wants to be moist, but not soggy.
Put the top part of the bottle back on and seal it shut using sticky tape. You could use a marker pen to draw a line level with the top of the compost, so you can see how much it goes down over time.
If you cut the entire bottle top off at step 1, you may find it fiddly to now put the top part back on. If so, hold it in place using a small piece of sticky tape. Then it will be easier to seal all the way around with a longer piece of sticky tape.
Place the bottle somewhere in your house that is not too hot or too cold.
Congratulations, your compost bottle is now ready to do its magic!
It will take several months for the materials in your bottle to break down into compost. You can check the bottle regularly and enjoy seeing what’s happening. You might want to take a photo every week or two to see what has changed.
If your bottle compost is looking very slimy or very dry, you could open it up again and add some more material to help. Add paper or cardboard if it’s wet or more water if it’s dry.
Your compost will be ready when it has the look and texture of garden soil. Open the bottle and it should also smell a bit like garden soil.
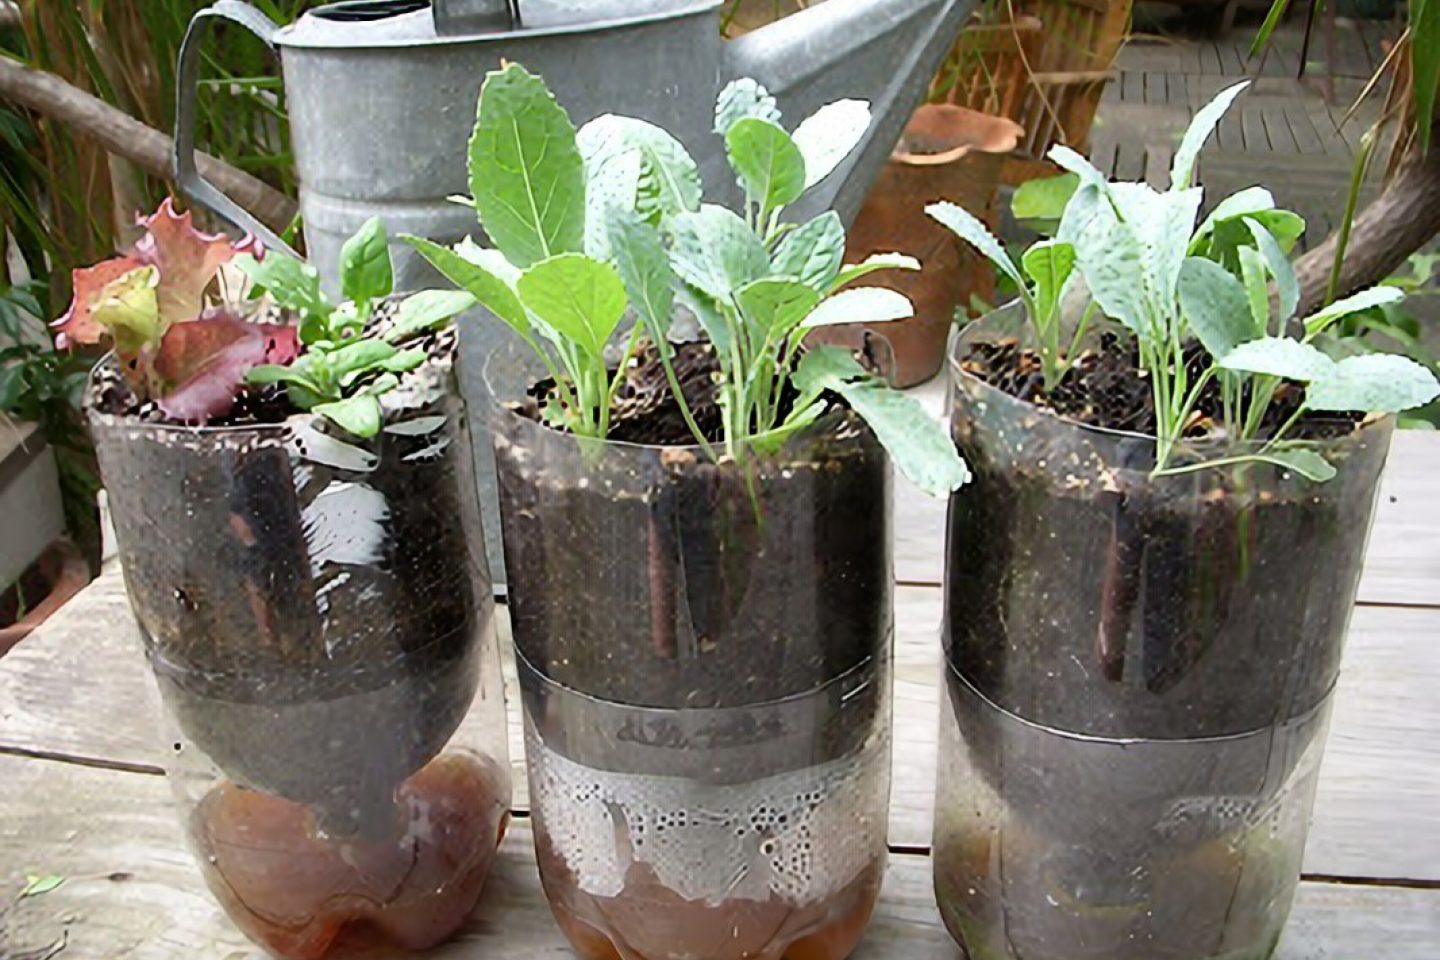
You can now use your compost as part of small planting projects! One idea if you wanted to re-use more bottles is to create recycled bottle planters – see image below.

Making compost is an environmentally friendly way to give your plants the nutrients they need. This guide shows you how to make it, where to use it plus top tips to compost with ease.

For as little as £1 a week, you could be in with the chance of winning up to £25,000 every week!
Play now