Helpful information
Timing: All year round
Where to do it: Indoors
Garden space: Large garden, small garden, balcony

Timing: All year round
Where to do it: Indoors
Garden space: Large garden, small garden, balcony
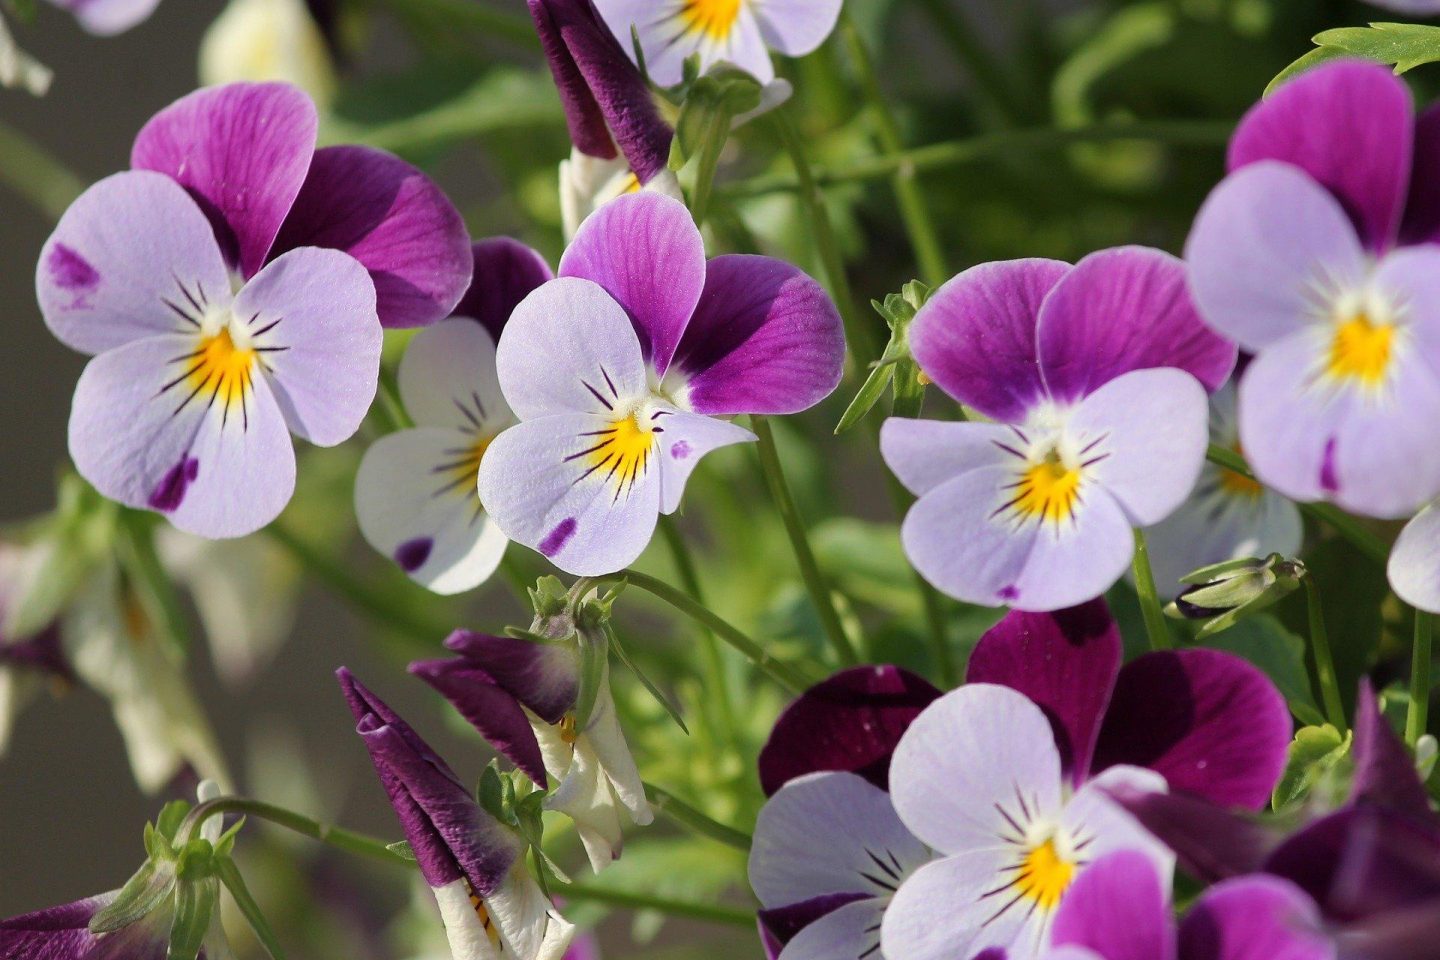
There are many varieties of flower that can be pressed and dried successfully. You should be able to find something suitable in any season of the year.
For the best results, it's a good idea to choose ‘flatter’ flowers. Flowers with big heads are more likely to go brown or not have such a pleasing effect.
It's fun to experiment with what's in your garden, but some particularly good flowers to try pressing include:
Essential items:
Optional items:
You can buy a dedicated flower press that includes all the equipment you need. Sometimes these have multiple stacking layers, which you may find a little less fiddly than arranging flowers on tissue.
Follow these steps to press flowers with ease.
Step 1: Gather what you need

Find a comfortable spot to do this activity and gather all you need. This activity is ideal to do seated at a table.
You don't want the flowers you choose to be too wet, so avoid picking too early in the morning. Also check any flowers you are using are not too wilted or damaged.
Make sure where you at sat is at a comfortable height, especially if you have difficulty bending. Make sure it’s easy to reach everything you need.
Try to position your elbows and shoulders at right angles. This reduces any pressure on tendons and joints.
Step 2: Arrange the flowers on tissue

Take one of the magazines (or flat piece of cardboard). Put a piece of tissue paper on top of it.
Carefully arrange the flowers and any foliage on the tissue paper. Make sure the flowers are not overlapping. If they are, it will make it more difficult for them to dry.
Take your time over this step. How the flowers are positioned is how they will ‘set’ when pressed.
If you have any challenges with dexterity or fine motor skills, have less flowers per piece of tissue. You could even have one flower per piece of tissue to avoid fiddly arranging.

Very carefully place another piece of tissue paper on top of your arrangement. Once this is in place, put another magazine (or flat piece of card) on top of the tissue. Press down firmly on the top magazine.
You should now have a ‘sandwich’ made up of the bottom magazine, tissue with flowers on, second piece of tissue then second magazine.
Step 4: Position and weight down with books
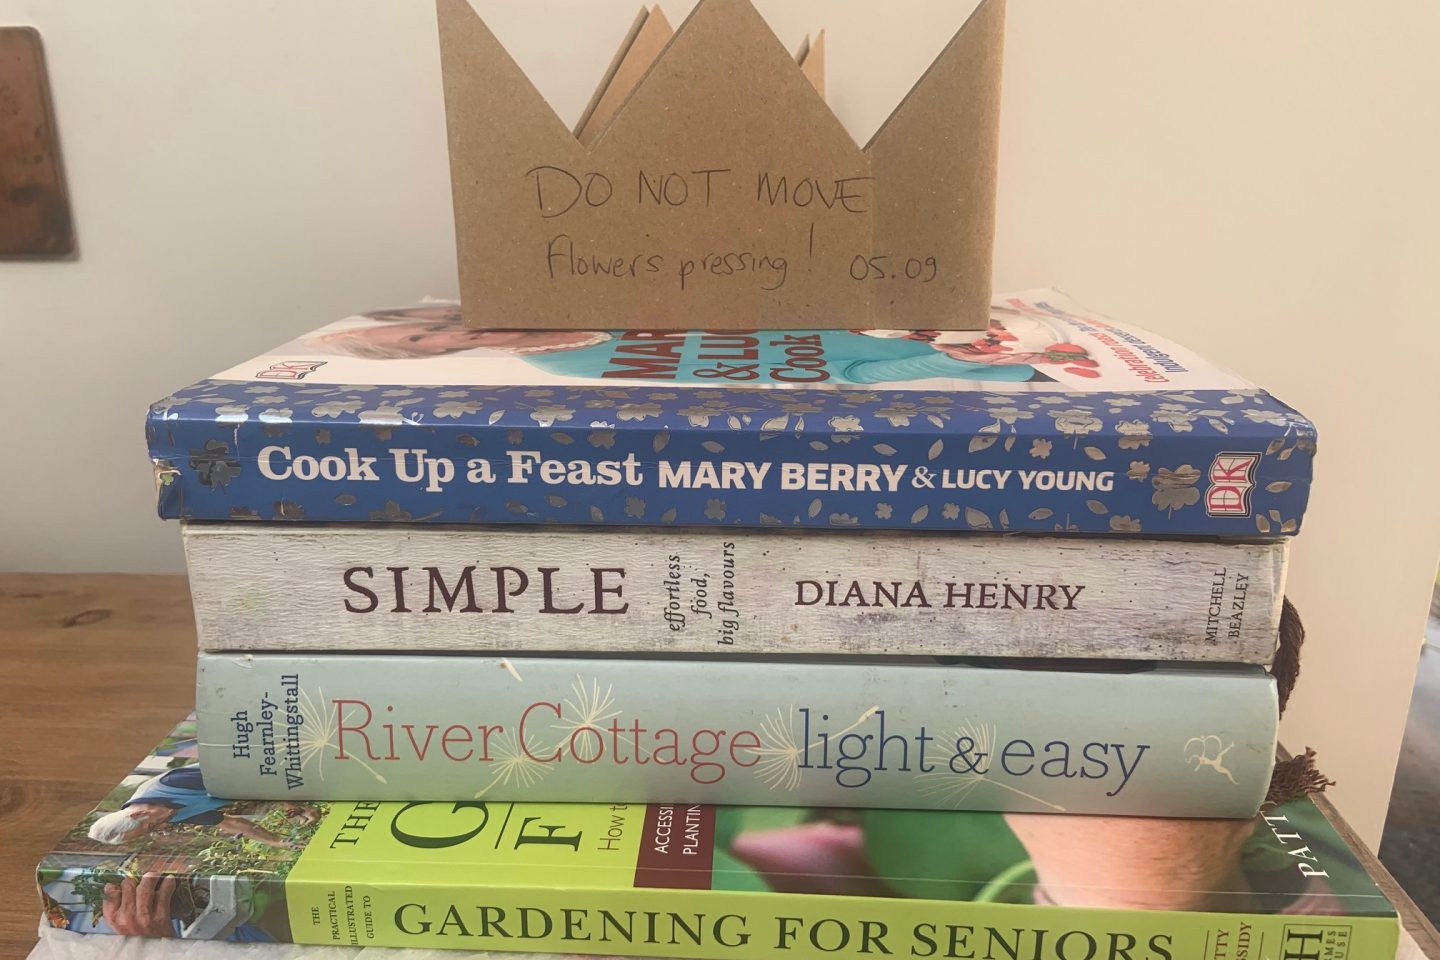
Move your complete stack to wherever it will sit and dry. You want to find a flat surface, where it will not be accidentally knocked or disturbed. Place your heavy books on top of the stack.
You may find it helpful to put a note on top of the stack of books. This could include the date you created it and a reminder not to move the book stack!
Step 5: Wait and then examine your flowers
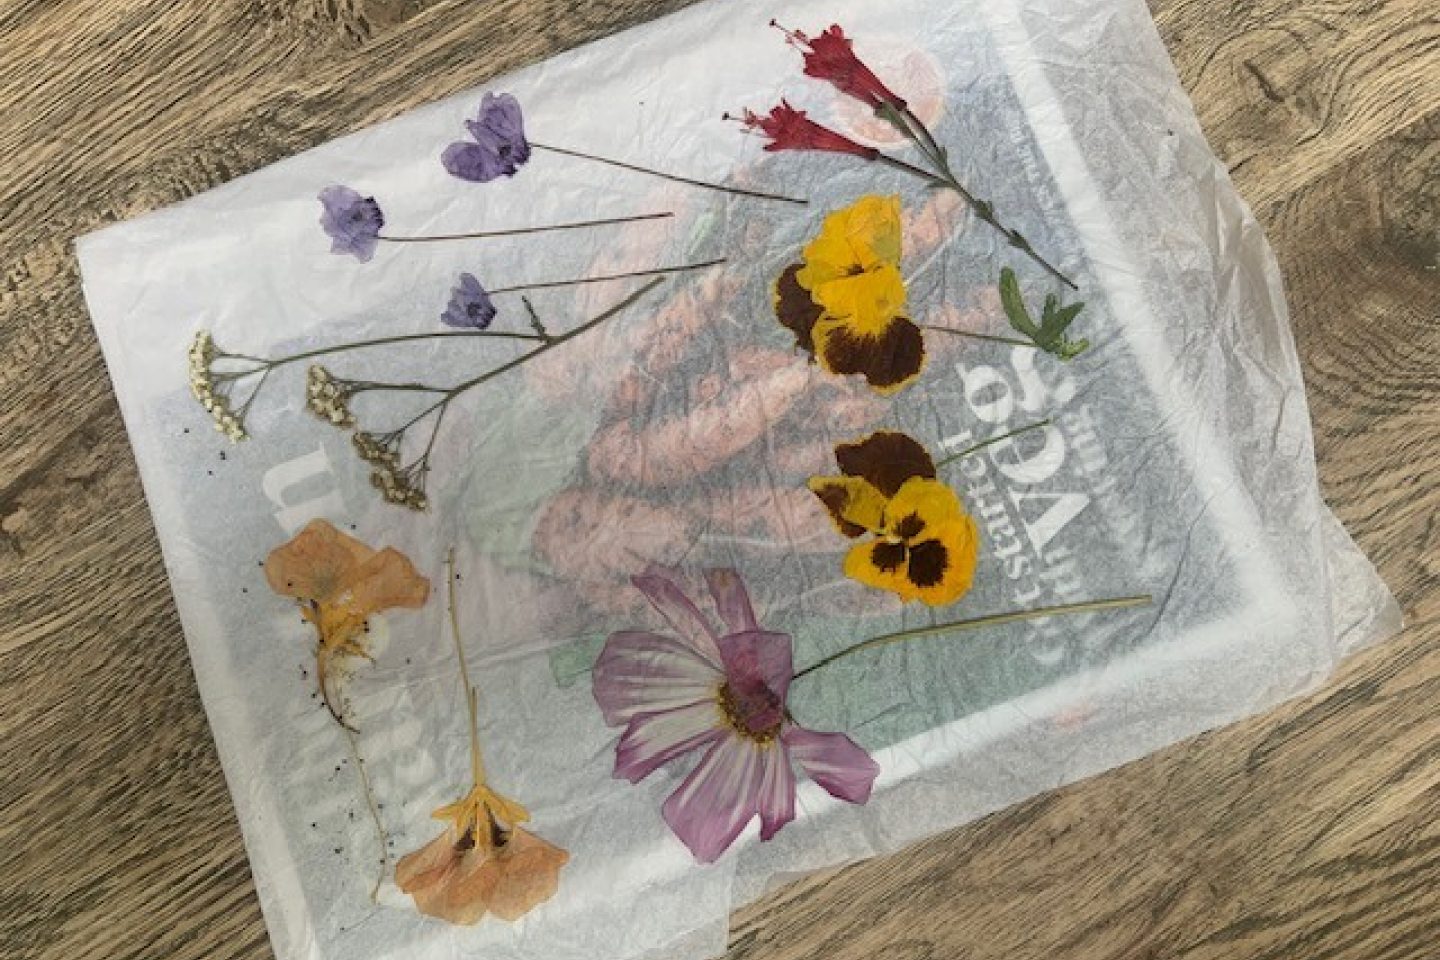
Leave your pressed arrangement for at least two weeks and up to four weeks. By this time, the flowers and leaves should be completely dry.
Take the heavy books off the top. Move your magazine and pressed flower stack back to a suitable working space. Carefully remove the top magazine and layer of tissue. Now for the excitement of seeing how your pressed flowers look!
It's very normal to have mixed results. Some flowers may be beautifully pressed, with most of their original colour and some may have gone brown. Make a note of which flowers you have most success with.
Step 6: Create your artwork

There are now all sorts of options open for using your dried flowers. For example:
Pressed flowers can be very delicate and brittle. You may find it easiest to use tweezers to gently lift and move them. To stick in place, use tiny dots of white ‘craft’ glue and leave to dry.
Your pressed flower artwork could make a lovely gift to someone else - or to yourself!
Have you created something using pressed flowers? We'd love to see it! Share your photo by sending an email to info@thrive.org.uk

Creating a bird feeder at home is a fun activity for all ages, using all natural items. It's like making a homemade meal for your daily visitors.

For as little as £1 a week, you could be in with the chance of winning up to £25,000 every week!
Play now

