Helpful information
Timing: All year round
Where to do it: Indoors
Garden space: Indoor space

Timing: All year round
Where to do it: Indoors
Garden space: Indoor space
Essential items
Follow these steps to make your grass hand print with ease.
Step 1: Gather what you need

Find a comfortable spot to do this activity and gather all you need. This activity is ideal to do seated at a table.
Make sure where you at sat is at a comfortable height, especially if you have difficulty bending. Make sure it’s easy to reach everything you need.
Try to position your elbows and shoulders at right angles. This reduces any pressure on tendons and joints.
Step 2: Draw the outline of your hand

Take your pen or pencil and piece of card. Draw around the outline of your hand. Don't worry too much about any little wobbles of the pen or pencil.
Step 3: Cut out your hand print

Using scissors, carefully cut all the way around the hand shape you have just drawn. It is up to you if you would like to include a bit of your wrist or not.
Put your card hand carefully to one side while you do the next step.
Step 4: Fill your container almost to the top with compost

Fill your container with compost. You want to fill it to around 2-3cm from the top.
You may find it easier to put compost in a big bowl first, instead of trying to move it straight from the compost bag into the container.
Step 5: Submerge your card hand in water
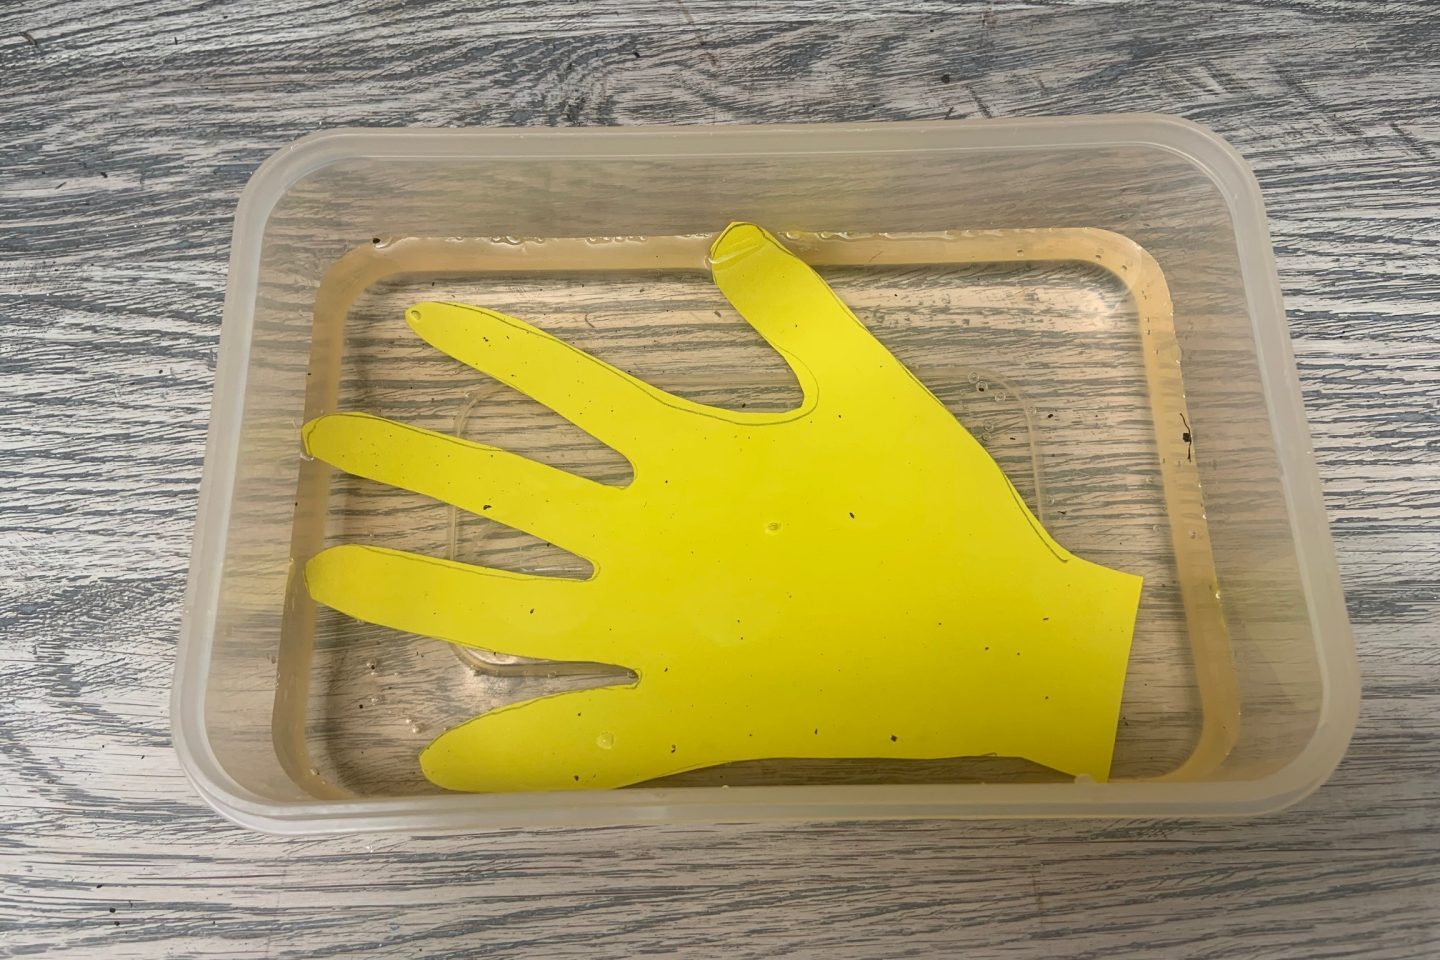
Dunk your card hand in water. An easy way to do this is to fill a tupperware container or lunch box with water and gently push the card hand to the bottom.
It doesn't need to be in the water for very long. Around 5 to 10 seconds is fine.
Step 6: Remove the hand and cover in grass seed

You want to try and do this next step quickly if possible. This is because you want the card to still be wet, so the grass seed will stick to it. Don't worry though, it will still work even if you go a bit slower.
Remove the card hand from the water and place on a flat surface. Putting it on a chopping board can help make this step a bit tidier!
Sprinkle grass seed over the hand print until it is completely covered. It's ok if the grass seed is also sprinkled outside the card shape - you will see in the next step that it will just stay on the flat surface when you pick up the hand.
Grass seed can be quite fiddly to handle. It can also come out quite quickly from the box. It may be easier to put the grass seed into a small bowl first, which you can than gently tip over your grass hand.
Step 7: Place the hand on the compost

Lift your cardboard hand gently and place it on top of the compost in your container.
Step 8: Cover with more compost
Gently add 1-2cm of compost to the container. This will cover the hand print. Try to add the top layer of compost gently, you want to try not to disturb the grass seed on the hand if possible.
Step 9: Put in place
You have finished creating your grass hand print! Now, you need to find a spot for it to germinate. Somewhere warm and light, like on a sunny windowsill, is ideal.
Now, you wait to enjoy the sight of your hand print germinating!
You will probably need to water the container. Carefully check the soil to see if it is dry. Water gently, so you don't disturb your carefully placed seeds.
It may only take a few days for the first green grass shoots to poke through. Within a week, you may see the clear outline of a hand growing.
Some seeds may have moved, especially between the fingers. To create a really clear hand shape, you could carefully pull out any out of place strands of grass. As grass grows so quickly, you may also decide to give it a little haircut with a pair of scissors!

You could keep trimming the grass on your hand print for as long as you like and enjoy your living artwork.
Once you are finished with it, you could use it to fill holes in the lawn, or you could add to your compost pile.

Creating a bird feeder at home is a fun activity for all ages, using all natural items. It's like making a homemade meal for your daily visitors.

For as little as £1 a week, you could be in with the chance of winning up to £25,000 every week!
Play now