Top tip
This is a good project for two people to do together. Preparing the wooden pieces and assembling the bird box is difficult to do alone.


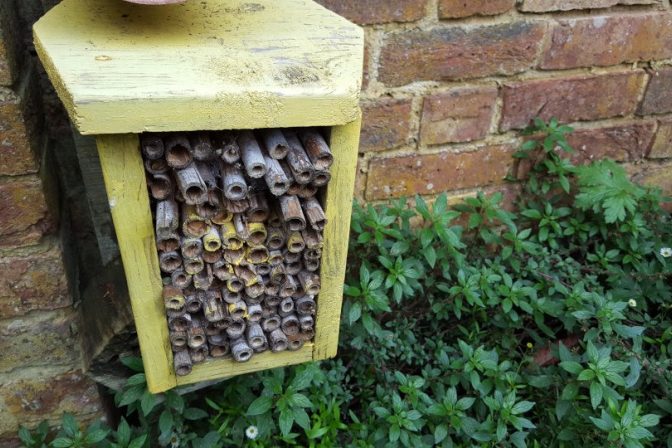
An important way to encourage wildlife to spend time in your garden is to have habitats for them. For some creatures, that means piles of leaves and sticks at ground level. For birds, they look for sheltered spots at height to make a nest.
If you don't have many tall trees, or you want to add more spots for birds to make home, bird boxes are a great addition.
You can buy bird boxes from garden centres or online. If you are interested in construction and have a basic level of woodworking skill, you could also try making your own.
Find instructions below to construct your own bird box, with thanks to Spencer's Wood Repair Café.
Which birds is this suitable for?
This bird box will suit smaller birds. Depending which birds you want to attract, create the front hole size accordingly:
This is a good project for two people to do together. Preparing the wooden pieces and assembling the bird box is difficult to do alone.
Essential items
If you like the idea of doing some assembly work, but cutting your own wooden pieces is too challenging, you can purchase self-assembly bird box kits.
Follow these steps to construct your bird box.
Step 1 - Prepare all the pieces
To be able to cut out all the pieces, you need a long piece of wood that is 150mm wide by at least 1340mm long and at least 15mm thick.
The easiest type of wood to cut is softer wood, such as pine and cedar. You could look for reclaimed wood, if you wanted to help reuse wood - although, this is not necessarily a cheaper option.
For a cutting guide, download this bird box cutting guide.
Once al the pieces have been cut, you can begin assembly. You may choose to cut the pieces one day and assemble another day.
Step 2 - Align the sides, back and base
Hold each in place. Make sure the top of each side is just touching the groove on the back piece.
Step 3 - Nail the front in place
Position the front on top of the side and base pieces. Insert 6 nails in the top (3 per side) so they are resting on the sides, making sure all pieces stay aligned. When you are happy with the placement, gently tap the nails through the front into the sides.
Step 4 - Nail the bottom of one side in place
Holding the base in place, turn the bird box carefully so one side is on the table and the other side is facing up. Check the base is aligned. Insert 2 nails at the bottom of the side piece, so they rest on the base. When you're happy, gently tap the nails through the side into the base.
Step 5 - Nail the back in place
Turn the bird box carefully so the front is against the table. The back will be facing upwards now. Make sure it is aligned. Make sure the top of each side piece is just touching the groove. Insert 6 nails in the back (3 per side) so they are resting on the sides, making sure all pieces stay aligned. When you are happy with the placement, gently tap the nails through the back into the sides.
Step 6 - Position the rubber strip on the roof piece
Refer to the bird box cutting guide for placement on the rubber strip. Insert 3 short nails to secure the strip to the roof piece, as shown in the diagram with yellow dots.
Step 7 - Secure the roof to the bird box
Turn the bird box so it is lying on its back. Position the roof so the top edge is aligned with the groove. Position the rubber piece as shown in the bird box cutting guide. Insert 3 short nails as shown in the diagram with red dots. Stand the box upright, then insert the last 3 short nails as shown in the diagram with blue dots.
Step 8 - Hang your bird box
Congratulations, you have finished constructing your bird box!
The best spot in the garden is at 2.2 metres or more above ground on a tree, shed or wall. Aim to have the hole facing in a north or east direction to avoid any chicks getting too hot.

Making your own bird feeder is straightforward and satisfying. Using an old plastic milk bottle is a double win, giving the birds a feast and reducing waste.
Every pound makes a real difference. Donate today to change lives in Birmingham.
Donate today