Helpful information
Timing: Plant mid spring to early summer for beautiful summer colour
Where to do it: Outdoors, indoors
Garden space: Small garden, balcony, no garden

Timing: Plant mid spring to early summer for beautiful summer colour
Where to do it: Outdoors, indoors
Garden space: Small garden, balcony, no garden

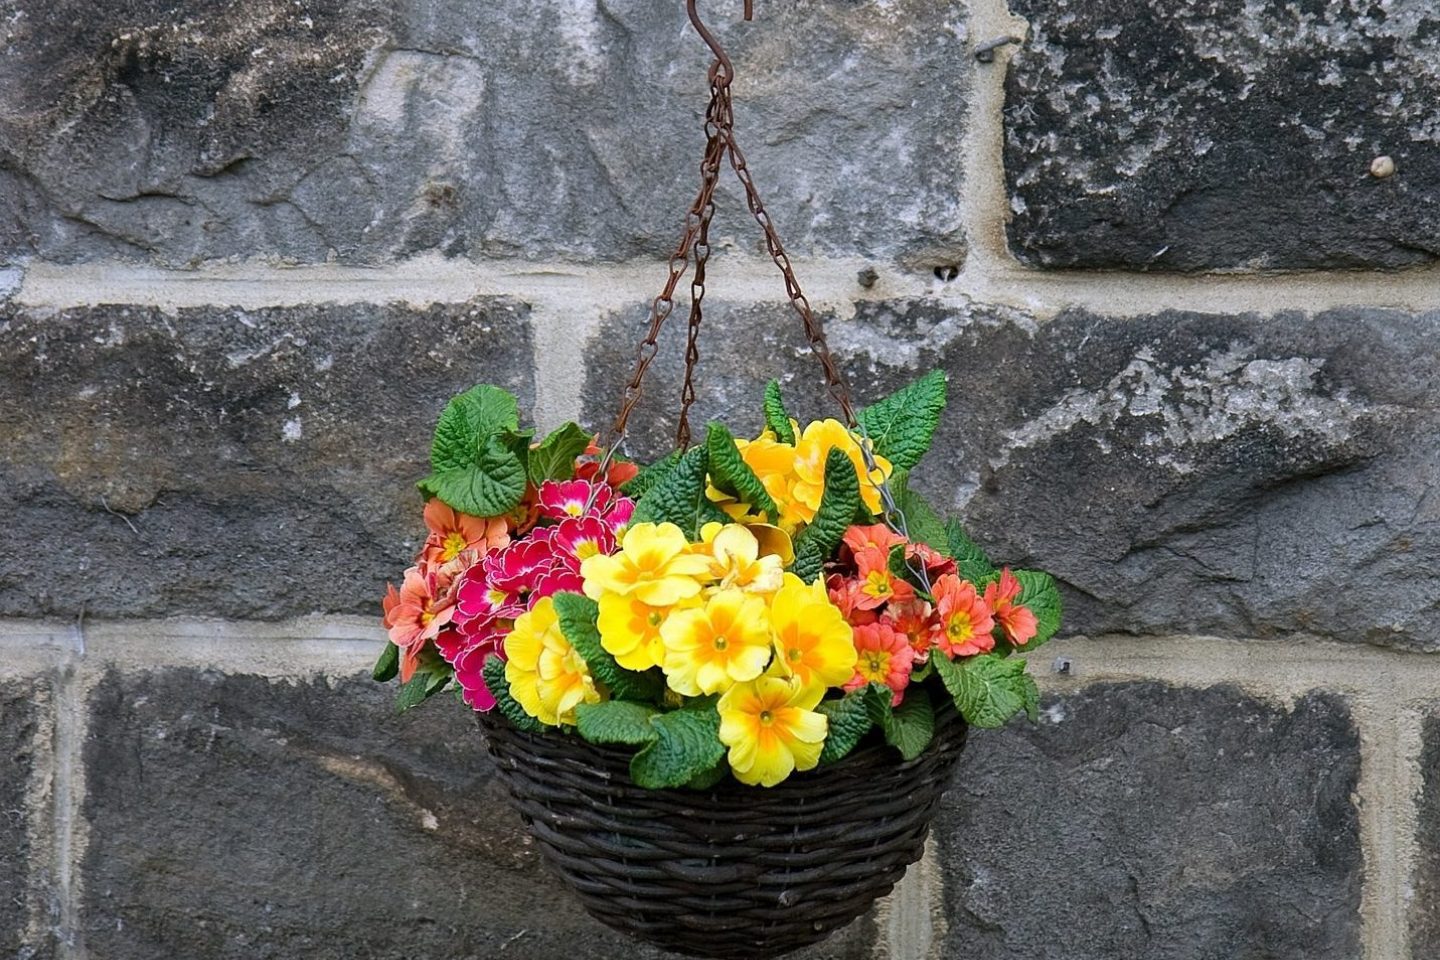
There are a huge variety of plants that you can grow in hanging baskets.
If you want to create a really full display, it’s a good idea to choose three types of plants: ‘thrillers, fillers and spillers’.
A ‘thriller’ is a taller plant that you place in the centre of your hanging basket. It creates structure and impact.
‘Fillers’ are the smaller plants that you place all around the central plant.
Any ‘spillers’ are trailing plants. Plant these at the edge of the basket so they can hang further over in time.
Example plants for a summer hanging basket
Some plants you could try growing in your summer hanging basket are:
These are usually available from garden centres, nurseries and online suppliers from spring.
Hanging baskets aren't only for flowers. You could try growing edible plants like tumbling tomatoes and herbs.
How many plants per hanging basket?
A rough rule is one plant per basket diameter inch. So, if you have a 12” basket, add 12 plants.
Some plants, like fuchsias and geraniums, grow quite big. You will need less of these to fill a basket. Around five for a 30cm basket should be enough.
If this is your first time planting a hanging basket, you may need to buy the basket before you get growing.
There are different options available. These include:
You may need to attach a bracket to the wall where your hanging basket will go. Some hanging baskets will have a bracket included, if not you will need to buy this separately. You may prefer to get some help fixing a bracket to a wall.
Whatever basket type you choose, think about the size compared to the space it will hang in and make sure it has good drainage.
Essential items
Optional items
Join our Gardening Club. It’s free! We will send you a fortnightly email newsletter with inspiration, tips and activities.
Sign up today
Follow these steps to fill your summer hanging basket with ease.
Step 1: Gather everything you need
Get all your equipment together where you will be working
Make sure your workspace is at a comfortable height, especially if you have difficulty bending. Make sure it’s easy to reach everything you need.
If you are sitting down, have your elbows and shoulders at right angles. This avoids pressure on tendons and joints.
Step 2: Fill basket with compost
If your hanging basket does not already have lining material, you may need to add this first. Make sure there is adequate drainage.
Fill the hanging basket with compost to within 7cm of the top.
Step 3 (optional): Add slow-release fertiliser and water-retaining gel
Adding slow-release fertiliser to the compost at this stage will help your plants get the nutrition they need all through summer. Measure the fertiliser carefully and mix with the compost. The instructions will state the correct amount.
You may also want to add water-retaining gel at this stage. Mix it well into the compost so it is evenly spread.
The soil in hanging baskets can dry out quickly in warm weather. This means they can need watering often. Adding water-retaining gel slows down the drying process, reducing the strain of frequent watering.
At Thrive, we sometimes put a sponge or two at the bottom of the basket before adding compost, as this can also help absorb and retain water.
Step 4: Position your plants
Gently take your central ‘thriller’ plant out of its pot. Place in the centre of the basket on the soil.
Remove the ‘filler’ plants from their pots and place around this central plant.
Finally, remove any ‘spiller’ plants from their pots and place on top of the soil around the edge of the basket.
If you are not using the thriller, filler, spiller approach, simply remove your plants from their pots and arrange where you want them to go in the basket.
Step 5: Add compost between plants
Add more compost to your hanging basket so you fill all gaps between plants. Firm the compost down gently. Make sure the plant roots are fully covered.
You want the soil level to be around 1cm below the top of the hanging basket. If it is full to the top, you may accidentally wash off some of the compost when you water the hanging basket.
Step 6: Water well
Water the compost well. You may want to do this in the sink or in a large bowl as the water will drain through.
Leave to drain. Then, hang up in its final spot.
Hanging baskets can dry out quite easily. Depending where they are, even on a rainy day they may still need watering. Water the compost and not the foliage or flowers. This helps the water reach the roots where it is needed.
Deadhead the flowers regularly. This will encourage them to continue flowering.
Watering hanging baskets can cause some strain if you need to reach up to them. A watering lance may be a helpful tool. The lance attachment connects onto your hose. This is also useful for watering across wide beds and borders.

Just like people, plants need water to survive. Find advice on when to water outdoors and how to water wisely, making this key activity easier to manage.

