Helpful information
Timing: Autumn (to encourage strong growth for spring) or spring (for instant growth)
Where to do it: Indoors, outdoors
Garden space: Large garden, small garden, balcony

Timing: Autumn (to encourage strong growth for spring) or spring (for instant growth)
Where to do it: Indoors, outdoors
Garden space: Large garden, small garden, balcony

You may think of spring as seed sowing season. But sweet peas and broad beans can be sown in autumn as well as spring. When you sow in autumn, they continue to grow slowly through winter, and will get a bit of a head-start compared to seeds sown in spring.
Both plants are hardy annuals, which means they live for just one year and can cope in cold weather. They love to get their roots down when it is cold and wet.
When growing sweet peas and broad beans from seed, the choice of container is important. Both plants develop long roots. This means they need a good depth of soil so their roots can grow well.
You can find special containers call root trainers in many garden centres. These work well when growing sweet peas and broad beans. They can be expensive, though, and are most likely made of plastic.
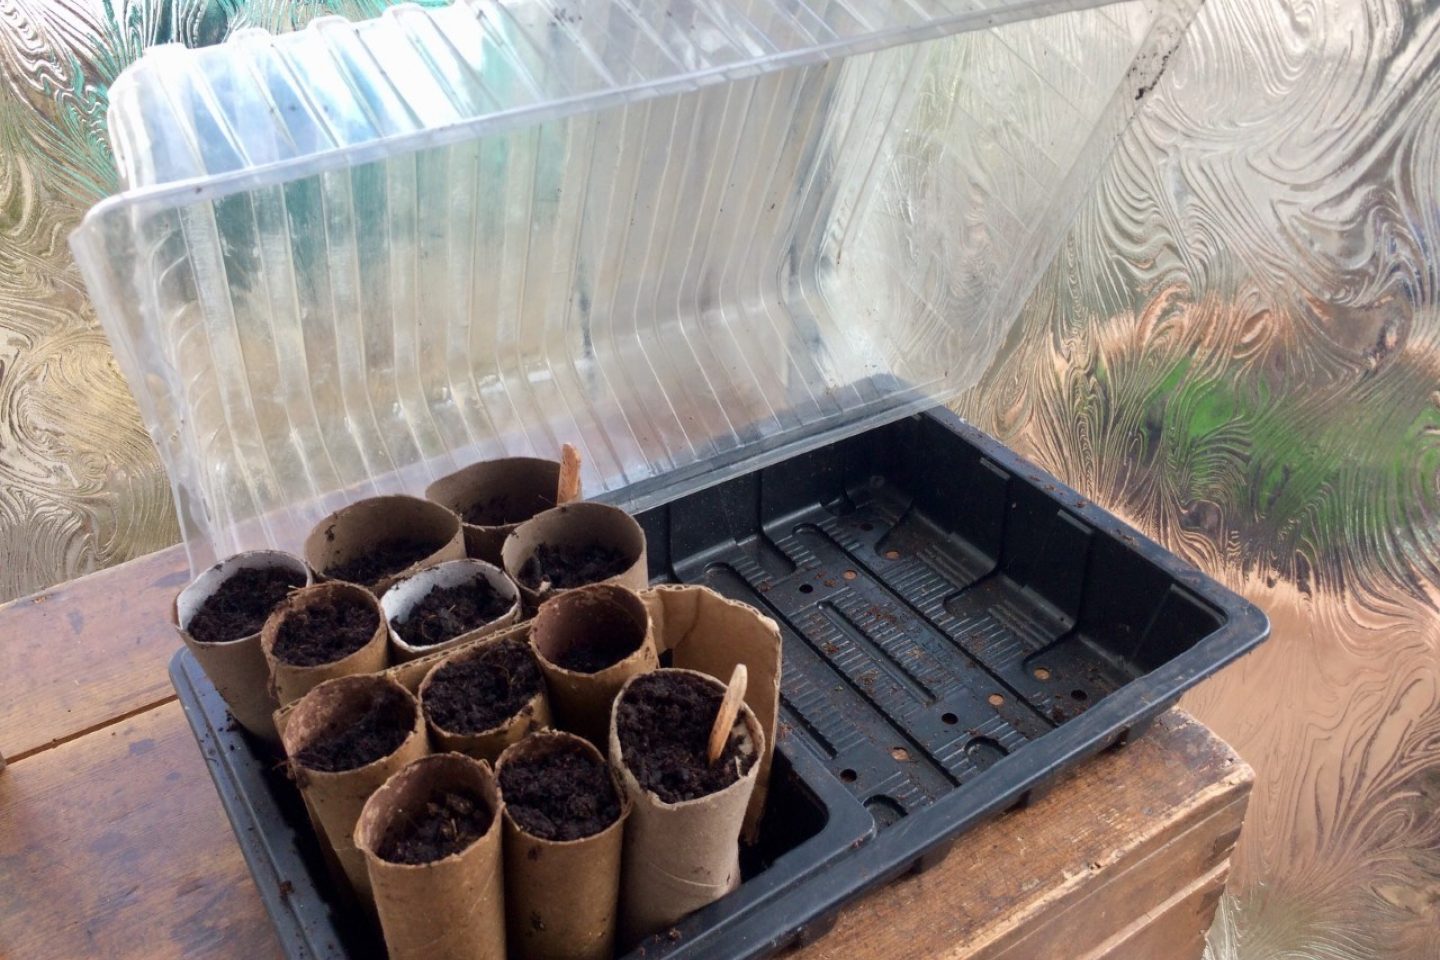
A great alternative is toilet roll tubes. Both sweet peas and broad beans can happily start growing in these, until they are ready for planting out. If you don't have enough toilet roll tubes, you can also use the inside of a kitchen roll of roll of wrapping paper.
Available now on iOS and Android, helping you garden your way to better health
Find out moreEssential items
Follow these steps to sow sweet peas or broad beans in toilet rolls with ease.
Step 1: Gather what you need
Get together all the items you need, using the list above. Find a suitable space in your home or garden. This could be indoors, in your conservatory, in the greenhouse or at a table in the garden.
Have your seed sowing area at a comfortable height, especially if you have difficulty bending. You want to be able to reach everything easily.
This is a good activity to do sitting down. To avoid pressure on your tendons and joins, aim to have your elbows and shoulders at right angles as you work.
A tidy tray can be very helpful for sowing seeds as it keeps all the equipment (and mess!) in a clearly defined area.
Step 2: Prepare your cardboard rolls (optional)
If you are using toilet roll tubes, they are already the perfect size for sowing seeds into. Skip this step.
If you don't have enough toilet roll tubes, you could also use the inside of a kitchen roll. Cut the tube across the middle so you have two tubes. You could also use the tube inside a roll of wrapping paper. You will be able to cut this into several tubes to sow into.
Step 3: Add compost and place on tray

Fill all your tubes with compost. You want to gently push the compost down, but not press it too firmly. Otherwise, the emerging roots won’t be able to form properly.
As you fill each tube, place it on a seed tray, or other similar container. This will help to support the tubes. It will also make it easier to move to them to their growing spot once you have finished sowing seeds.
Step 4: Sow your seeds

Open the seed packet.
For sweet peas: Carefully place two seeds on top of the compost of one tube. Gently push both seeds down into the compost. You want them to be around 4-5cm deep.
The broad beans: Make a single hole in each compost tube. You could use a dibber to make holes, or a pencil or your finger works fine. Place one broad bean seed into each hole.
Repeat for each toilet roll tube until you have sown seeds in all of them.
Sowing sweet pea seeds can be fiddly. You may want to pour the seeds onto a saucer to make them easier to handle. If you have any visual impairment, choose a bright coloured saucer.
Another helpful method is to use a wet toothpick to pick up each seed.
Broad bean seeds are larger and easier to see and handle.
Step 5: Cover with compost
Lightly cover each toilet roll tube with a little extra compost.
Step 6: Water
Gently water each tube. You don't want to soak them. A small watering can, like an indoor watering can, is helpful to control the amount of water.
Step 7: Put in place

Place your tray of seeds in toilet rolls somewhere warm and bright. A sunny windowsill, frost-free porch or in a greenhouse are all good options.
If you have one, cover your tubes with a propagator lid.
Step 8: Add plant labels
Pop in a label with the name of the seeds and the date you sowed them.
Continue to water your seeds when needed. Take care not to soak the cardboard tubes when watering, or they may go soggy and collapse.
Your seeds should hopefully germinate (the first green shoots will appear) in about 10 days.
Leave them to grow for roughly 3 weeks more. By this point, you should have the first true leaves - i.e. the ones that look like the final leaf shape.
Now, you can pinch out your seedlings. This simply means removing the growing tip. The reason for doing this is to help produce a stocky, strong plant.
If you have sown seeds in autumn, your seedlings will continue to grow through winter and into early spring. Around April (depending when you sowed your seeds) you can usually plant them out. Because they are in a biodegradable tube, you can plant directly into their final container outside or in the ground. The tube will eventually compost away.