Growing paperwhite bulbs - helpful information
Timing: Autumn (plant bulbs in October if you would like flowers in time for Christmas)
Where to do it: Indoors
Garden space: Indoors

Timing: Autumn (plant bulbs in October if you would like flowers in time for Christmas)
Where to do it: Indoors
Garden space: Indoors
Essential items
Optional items
It is a good idea to wear gloves whenever touching bulbs, as bulbs can irritate some people's skin
Step 1. Gather your equipment

Find a comfortable spot to work in. Have all your items within easy reach.
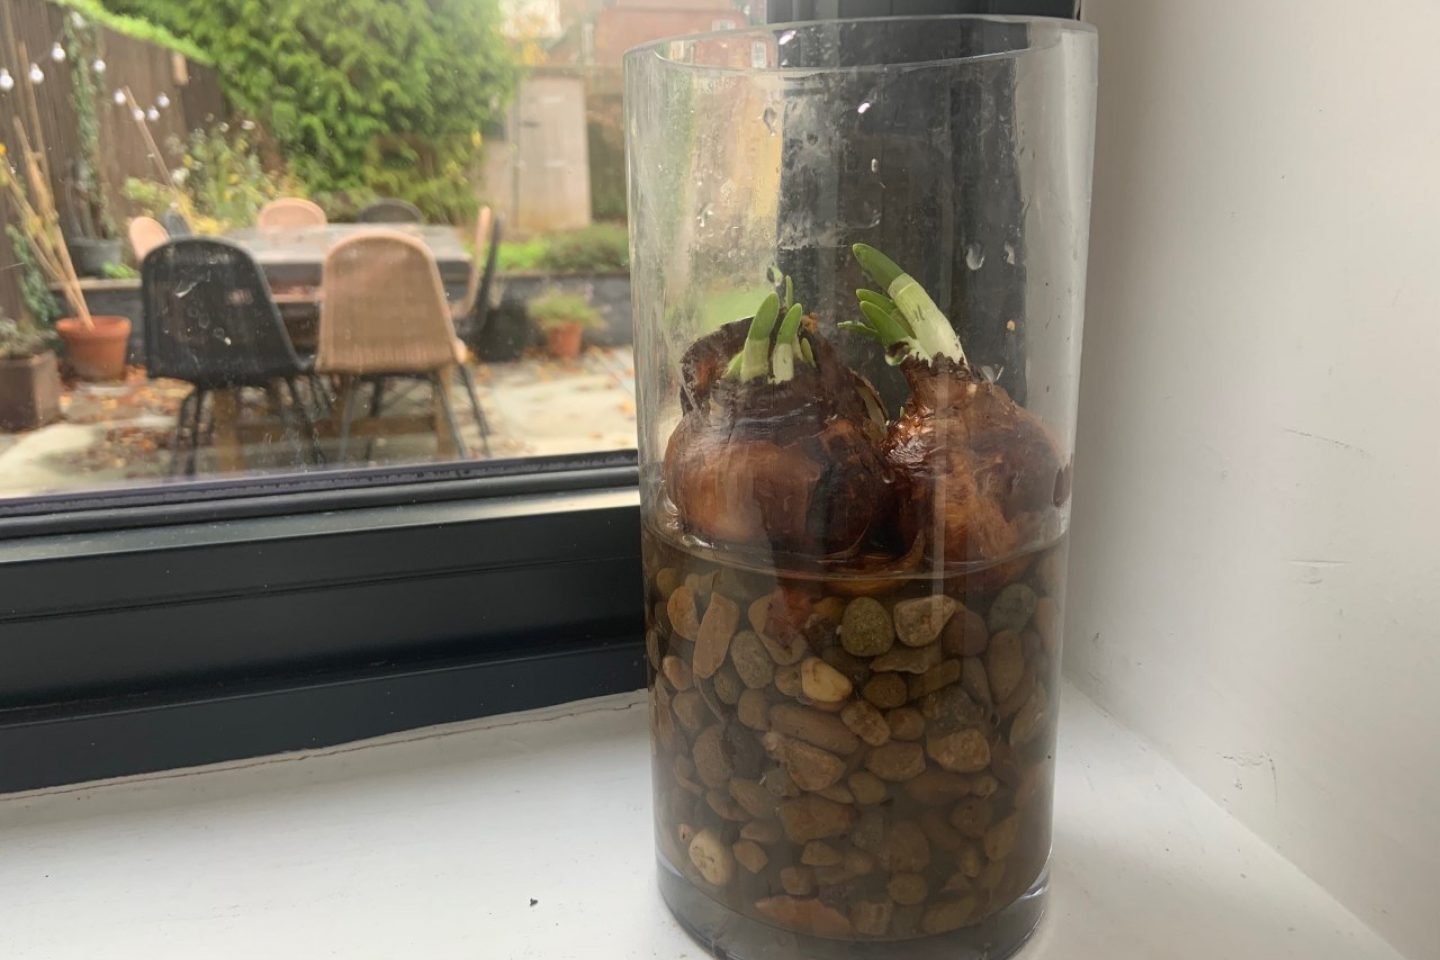
Step 2. Put pebbles or stones in your vase

A tall, see-through vase can be ideal for growing paperwhite bulbs. This will allow you to see the roots develop. If you don't have one, shorter vases and ones you can't see through are fine.
Add your glass stones, gravel, or pebbles to the vase. If the gravel or pebbles you are using are quite dirty, you may want to wash them with some water first. You could put them in a sieve to do this, then let the water drain.
Paperwhites can grow quite tall, so it's a good idea to only fill the vase half way or less. This way, it can support the stems as the plant grows.
Step 3. Position your bulbs

Place the bulbs on top of the stones or pebbles. Push them down very gently, so the bottoms of the bulbs are just below the surface.
You can place as many bulbs as you can comfortably fit on the surface. Try not to squash them together too much.
Step 4. Add water

Fill the container with water until the water level is just below the bulbs. Be careful not to pour in too much water otherwise the bulbs might rot.
Step 5. Place on a cool, bright windowsill
Find a spot where you can enjoy watching them grow. Keep the water topped up. Soon (perhaps in 6 - 8 weeks) you will be rewarded with a mass of stunning flowers that will cheer up any winter’s day.

Some people may find the scent of paperwhites a bit strong for their liking. In that case, just enjoy looking at them from a distance and don't sniff too closely!
Some bulbs can be planted out in the garden after flowering. Paperwhites generally don't survive in very cold weather. It is probably best to just enjoy them this year, then add to the compost pile when done.
Or, you could always give planting in the garden a go and just see what happens!

When the weather is cold, you can still enjoying growing indoors. Plant these bulbs inside in autumn and you may enjoy flowers in your home during winter.

For as little as £1 a week, you could be in with the chance of winning up to £25,000 every week!
Play now